Monday, July 27, 2009

Course Preparation

Photoshop Skill Set Self Evaluation

Please review the list of Photoshop skill areas below and note those with which you are uncomfortable or unsure.

· Navigating the work area.
· Working with the file browser.
· Working with native Photoshop files.
· Creating and saving a new document.
· The menu and status bar.
· Understanding different file formats.
· Importing and scanning images and artwork.
· Keyboard shortcuts.
· Understanding individual tools.
· The tool options bar and preset manager.
· Working with palettes and context menus.
· Working with resolution.
· Aligning images.
· Using the unsharp mask.
· Creating and optimizing thumbnails and images.
· Understanding the basics of color modes.
· The color picker.
· The color and swatches palettes.
· Using the eyedropper.
· Using the info and navigator palettes.
· Selection tools.
· Working with selections.
· Transforming selections and content.
· Understanding quick masks.
· Layers.
· Layer blending modes and opacity.
· Adding creativity with layer styles.
· Working with the history palette.
· Basic image retouching.
· Painting tools and techniques.
· Creating patterns and the pattern stamp tool.
· Gradients.
· Basic color correction and color theory.
· Working with color creatively.
· Hand-coloring images and graphics.
· Using type.
· The type tool.
· The character and paragraph palettes.
· Transforming type
· Type styles and effects.
· Using filters creatively.
· Creating buttons, photographic edges and working with actions and shapes.
· Automating tasks using actions.
· Designing creative buttons.
· Creating navigation bars.
· Creating photographic edges and frames.

I can do a complex path using the path tool’s bezel handles. Yes or No
I can make (not filter) a realistic drop shadow Yes or No
I can combine multiple layers of an image exposed in a bracket. Yes or No
I can build an action and batch actions Yes or No
I can automate actions and fill file info Yes or No

All of these tasks are used in photo retouching and in assignments for this course. Review the skills in the Photoshop manual or the help section of the program.

Being able to perform seamless tasks saves and time makes the post production less stressful and builds your battery of solutions to image clean-up.

Friday, July 24, 2009

Eleven Weeks of Discovery

This is one of the photography courses I offer. It can be presented in school or studio settings. Equipment for the course can be provided depending on the number of students and location. The course is limited to 12 students

In the food photography course I bring the students through a progression lectures, demonstrations and complex assignments. Each building on skills of the previous. The assignments are detailed and require hours of planning and preparation. Students sometime find that they spend more time preparing for a photo shoot than actually shooting. This is Discovery #1; a good photo shoot is the result of good planning. Your reward is the shooting itself, that is why we do this, we love to make pictures. It is essential we take time for planning, pre-visualizing, and assembling the necessary tools and talent .

Each studio session involves lecture presentations, set building, food styling, shooting the days assignment, tear down and planning of the next photo shoot. Each studio/classroom session is a minimum of five hours not including propping, shopping, and post production. These tasks are done outside of class.

Course Objectives:
Upon completion my course the students should be able to:
  1. Read the specific lighting needs of various types of food.
  2. Light, compose, and style basic foods for close up photography.
  3. Understand ethical and legal aspects of food photography.
  4. Refine and critique food photographs used for print productions.
  5. Shoot and retouch images for use in provided layouts.
  6. Manage image files for quality, output and application
  7. Understand the Visual Aspects of Food
  8. Understand the Markets for and Applications of Food Images
  9. Devise a Plan and Work Under Time Limits
  10. Anticipate a “Treatment”
  11. Read the Surface of Objects and Pre-Visualize
  12. Expanded Lighting Skills and Experience
  13. Build Studio Confidence
  14. Create Portfolio Quality Images

Weekly Course Assignments:
  1. Introduction to Food Photography
  2. Style, Clip Paths and Drop Shadows
  3. Layered Imaging, Lighting Lab and Packaging Shoot
  4. Classic Basket (Field Trip)
  5. Impossible Layouts and Triple Composite
  6. Wet Sets and Pour Photography
  7. Layering and Exploding Food
  8. Cook Book and How-to
  9. Wild Card, Juxtapose
  10. Location Shoot (Field Trip)
  11. Final Classes, Package Inset or Magazine Cover Final Exam


Each class begins with a critique of the previous assignment's images, followed by a presentation and demonstration for the next assignment. Student teams then gather for set building and the days production. Although the teams shoot together, each student is responsible for their own files and post production of the images.

Friday, May 30, 2008

Exploded Food

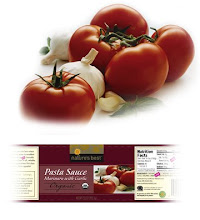
One of my favorite assignments if the studio is exploded food.
Here I have assembled the elements for a web banner and trade show exhibit. The original files are 18 inches wide, using my 22 Mp back on a 4x5 camera. (The same 4x5 I have been using since college.( News Lenses)).

These Tortillas are really good, fluffy, chewy and soft. The falling concept was mine, trying to convey the lightness of the product.

I have taught this technique to dozens of photographers.